Thursday, December 27, 2018

Cardinality and RelatedTableCardinality table relation property in AX 2012


Specifically, the Cardinality property corresponds to the notation on the child table (SalesLine in this case). So it should be ZeroMore (0…*).

RelatedTableCardinality property corresponds to the notation on the parent table (SalesTable). So it should be ExactlyOne (1:1).

Semantically, Cardinality specifies how many instances of SalesLine row can be related to a single instance of SalesTable row. ZeroMore means that for every sale order, there can be zero, or more sales lines related to it. If the business requirement dictates that you need to have at least one sales line to be able to create a sales order, the Cardinality would be OneMore (1:*).

RelatedTableCardinality specifies how many instances of SalesTable row can be related to a single instance of SalesLine row. ExactlyOne means that every sales line should belong to one and only one sales order.

Friday, December 14, 2018

EDT and EDT Relation in AX 2012

Extended data types (EDTs) are user-defined types, based on the primitive data types

  • boolean, 
  • integer, 
  • real, 
  • string, 
  • and date, 
  • and the composite type container.

 You can also base EDTs on other EDTs.

An EDT is a primitive data type or container with a supplementary name and some additional properties.

For example, you could create a new EDT called Name and base it on a string.

Thereafter you can use the new EDT in variable and field declarations in the development environment.


The benefits of EDTs are as follows:


  • Code is easier to read because variables have a meaningful data type. For example, Name instead of string.
  • The properties you set for an EDT are used by all instances of that type, which reduces work and promotes consistency. For example, account numbers (AccountNum data type) have the same properties throughout the system.
  • You can create hierarchies of EDTs, inheriting the properties that are appropriate from the parent and changing the other properties. For example, the ItemCode data type is used as the basis for the MarkupItemCode and PriceDiscItemCode data types.


Define an Extended Data Type as an Array :

You can create an extended data type in the Application Object Tree (AOT) that contains multiple elements. This enables you to store multiple data elements in a single field that is based on this extended data type.

A typical example is an extended data type for handling an address. Instead of defining three fields on your form to enter the address, you can define an extended data type with three elements (the first element exists by default), as shown in the following figure.

Extended Data Types in the AOT


When you create a form based on a table that contains a field of the MyAddress type, MorphX automatically generates a field on your form for each element in the MyAddress definition. The definition of the MyAddress type above causes 3 fields to be generated on a form, called Address, Address1, and Address2.


EDT Relations :


  • We can create the relation in AX with the help of EDT.
  • After creation of EDT in the AX we have to assign the "Reference Table" in the property then we can assign the reference table field in the Table reference node.
  • drag it under fields nodes of your table and it will prompt you for foreign key relationship. if you hit YES, it is going to work and create relationship automatically. 


Monday, December 10, 2018

To fetch Department Dimension using X++

public void lookup()
{
    Query                   query  = new Query();
    QueryBuildDataSource    qbds;
    SysTableLookup          sysTableLookup;
    sysTableLookup = sysTableLookup::newParameters(tableNum(OMOperatingUnit),this);
    sysTableLookup.addLookupfield(fieldNum(OMOperatingUnit,OMOperatingUnitNumber));
    sysTableLookup.addLookupfield(fieldNum(OMOperatingUnit,Name));
    sysTableLookup.addLookupfield(fieldNum(OMOperatingUnit,OMOperatingUnitType));
    sysTableLookup.addSelectionField(fieldNum(OMOperatingUnit,Name));
    qbds = query.addDataSource(tableNum(OMOperatingUnit));
    qbds.addSortField(fieldNum(OMOperatingUnit,OMOperatingUnitNumber));
    qbds.addRange(fieldNum(OMOperatingUnit,OMOperatingUnitType)).value(enum2str(OMOperatingUnitType::OMDepartment));
    sysTableLookup.parmQuery(query);
    sysTableLookup.performFormLookup();
}

Wednesday, November 14, 2018

Get formRun, Form control, datasource and selected record from form datasource using Eventhandlers on Form in D365

Get formRun, Form control, datasource and selected record from form datasource :

[FormDataSourceEventHandler(formDataSourceStr(MyForm, MyRandomTableDS), FormDataSourceEventType::Written)] public static void MyRandomTableDS_OnWritten(FormDataSource sender, FormDataSourceEventArgs e)
{

FormRun formRun = sender.formRun() as FormRun;

// you can even call custom methods
formRun.myCustomMethod();

// Get the selected datasource record
TableName tableBuffer = sender.cursor();

// Get datasource variable
FormDataSource DSVariable = sender.formRun().dataSource(“TableName”);
}

Get form datasource from xFormRun
[FormEventHandler(formStr(SomeForm), FormEventType::Initialized)] public static void SomeForm_OnInitialized(xFormRun sender, FormEventArgs e)
{
FormDataSource MyRandomTable_ds = sender.dataSource(formDataSourceStr(SomeForm, MyRandomTableDS));

}

Access form control from xFormRun
[FormEventHandler(formStr(SomeForm), FormEventType::Initialized)] public static void SomeForm_OnInitialized(xFormRun sender, FormEventArgs e)
{
// set the control to invisible as an example
sender.design().controlName(formControlStr(SomeForm, MyControl)).visible(false);
}

Get FormRun from form control
[FormControlEventHandler(formControlStr(MyForm, MyButton), FormControlEventType::Clicked)] public static void MyButton_OnClicked(FormControl sender, FormControlEventArgs e)
{
FormRun formRun = sender.formRun() as FormRun;
formRun.myCustomMethod();
}

Get current record in form control event
[FormControlEventHandler(formControlStr(SomeForm, SomeButton), FormControlEventType::Clicked)] public static void SomeButton_OnClicked(FormControl sender, FormControlEventArgs e)
{
// as an example the datasource number is used for access; I perceive the formDataSourceStr as more robust
SomeTable callerRec = sender.formRun().dataSource(1).cursor();
}

Tuesday, November 13, 2018

Mani IQ


  1. Difference between 2012 and D365?
  2. COC in Detail
  3. Eventhandlers -- Pre and Post
  4. Eventhandlers on table level.
  5. What is post load method in data entities?
  6. Data entities --  Method calling sequences
  7. SSRS Reports -- Types of reports
  8. Difference between Query based reports and RDP based reports
  9. Attributes in RDP based reports.
  10. Method calling sequence on Table and Form Level?
  11. What is initValue?
  12. Difference between Init and InitValue?
  13. How to get the current record of the table using EventHandler?
  14. What is Args. What is purpose of Args?
  15. Variables() in D365FO event handler?
  16. Purpose of super Method?
  17. Difference between Normal relation and Foreign Key relation?
  18. Process of adding additional fields to the Standard Table?


Data entites method calling sequence in D365FO

EXPORT:
       Entity- postLoad()
       staging - insert()
       Entity- postLoad() - depends on records

IMPORT:
       staging - postLoad()
       Entity - postLoad()
       Entity - initValue()
       Entity - validateField() - depends on no of fields
       Entity - validateWrite()
       Entity - insert() / update()
       Entity - persistEntity()
       Entity - initializeEntityDataSource()
       Entity - mapEntityToDataSource()
       Entity - insertEntityDataSource() / updateEntityDataSource()
       Entity - mapDataSourceToEntity()
       staging - postLoad()

Record set operations or set based operators -- To speed up SQL operations

When we are inserting or updating large number of record or Bulk operations we can use the below listed operations..

insert_recordset :

insert_recordset copies data from one or more tables directly into one resulting destination table on a single server trip. Using insert_recordset is faster than using an array insert. However, array inserts are more flexible if you want to handle the data before you insert it.

insert_recordset is a record set-based operator, which performs operations on multiple records at a time.

Syntax :

The ListOfFields in the destination table must match the list of fields in the source tables.
Data is transferred in the order that it appears in the list of fields.
Fields in the destination table that are not present in the list of fields are assigned zero-values as in other areas in X++. System fields, including RecId, are assigned transparently by the kernel in the destination table.

insert_recordset DestinationTable ( ListOfFields )

select ListOfFields1 from SourceTable [ where WhereClause ]

[ join ListOfFields2 from JoinedSourceTable

[ where JoinedWhereClause ]]

Example : 

The records, myNum and mySum, are retrieved from the table anotherTable and inserted into the table myTable. The records are grouped according to myNum, and only the myNum records with a value less than or equal to 100 are included in the insertion.

insert_recordset myTable (myNum, mySum)
    select myNum, sum(myValue)
        from anotherTable
        group by myNum
        where myNum <= 100;


update_recordset :

The X++ SQL statement update_recordset enables you to update multiple rows in a single trip to the server. This means that certain tasks may have improved performance by using the power of the SQL server.

update_recordset resembles delete_from in X++ and to UPDATE SET in SQL. It works on the database server-side on an SQL-style record set, instead of retrieving each record separately by fetching, changing, and updating.


If the update method is overridden, the implementation falls back to a classic looping construction, updating records one by one just as delete_from does for deletions. This also means that the construction works on temporary tables, and whole-table-cached tables by using the looping construction.

Example :

MyTable myTableBuffer;
;
update_recordset myTableBuffer
setting field1 = field1 * 1.10;

delete_from :

You can delete multiple records from a database table by using a delete_from statement. This can be more efficient and faster than deleting one record at a time by using the xRecord.delete method in a loop.


If you have overridden the delete method, the system interprets the delete_from statement into code that calls the delete method one time for each row that is deleted.

Example :

static void DeleteMultiRow1aJob(Args _args)
{
    MyWidgetTable tabWidget;
    ;
    delete_from tabWidget
        where tabWidget .quantity <= 100;

}

But these set based operation will roll back to row-by-row operation when either of the following condition is true:

  • it is not an SQL table (Eg. temporary table)
  • Database log is enabled for the table
  • Alert is setup for this table
  • Record level security is enabled for the table
  • AOSValidation method is overwritten

when using insert_recordset
the .insert() method is overwritten

when using update_recordset
the .update() method is overwritten

when using delete_from
the .delete() method is overwritten
DeleteAction is defined


To prevent it from fallback to row-by-row operation, the following method can be used if:

  • Delete action is defined, use skipDeleteActions
  • Database log is setup, use skipDatabaseLog
  • Alert is setup, use skipEvents
  • Method is overloaded (.insert(), .update, .delete()), use skipDataMethods


Non-SQL table does not support set base operation.

http://mybhat.blogspot.com/2012/06/dynamics-ax-skipdatamethods-set-based.html
https://docs.microsoft.com/en-us/previous-versions/dynamicsax-2009/developer/aa673589(v%3dax.50)

Difference between Validate Field and Validate Write in AX

ValidateField

It is executed when we move the cursor from one field to another one. i.e ValidateField () fires every time the user changes the value in a field. The methods parameters give you the fieldId, It gives back a data of boolean type. If the result is false, the cursor will remain in the field.

The call to the super method () verifies the validation relations, that is to say, relations in a field where the Validate property has affirmative value. Therefore, we must respect the task made by this super method ().

Validations do not have to be codified that can be made with some property. Thus, we will avoid to write code in the ValidateField method if the conditions can be verified with the Validate property of a relation.


ValidateWrite

It is executed before inserting or updating a registry in the table. The validateWrite() method validates that each mandatory field is filled in, It gives back a data of boolean type. If it gives back false, the registry is not inserted or updates.

The call to the super method () examines all the fields to verify the value of the Mandatoryproperty. Therefore, we must respect the task made by this super method ().

We will avoid to introduce code that it verifies if a field has value, whenever we pruned to use the Mandatory property.

http://santoshax.blogspot.com/2013/07/how-many-types-of-data-validation.html
https://dynamicsuser.net/ax/f/developers/40057/when-to-use-validatefield-or-validatewrite-on-table

Monday, November 12, 2018

Difference between Init and InitValue Method in AX

We don't have init method on Table level, we have InitValue method in Table.

initValue :


  • Executed when a new record is added.
  • initValue is automatically called from forms.


We have both init and initValue at form datasource level

init

  • The form is opened.
  • Creates a data source query based on the data source properties.

initValue

  • A new record is created. The purpose is to fill in initial values in the record.
  • Initializes field values in a new record.

If you use this method to specify field values, the new values are not automatically saved to the database when you leave the form. To specify values that you want to save when you leave the form, use the Create method.


We have only init method in Form Level :

init:
  • The form is opened.
  • Use the method to initialize a form. The init method is started immediately after the new method and creates the run-time image of the form.

Typical uses of init include the following:

  • Modifying a form by using the FormBuild system class
  • Initializing variables for specific controls on the form.
  • You must call the super method if you override this method, and you should add your code before the super call.

In addition to creating the form, the call to the super method constructs the data source for the form by starting the init method on the data source. The form data source init method creates the query to fetch data from the database and sets up links if the form is linked to another form.

Friday, November 9, 2018

Computed columns and virtual fields in data entities


A data entity can have additional unmapped fields beyond those that are directly mapped to fields of the data sources. There are mechanisms for generating values for unmapped fields:
  • Custom X++ code
  • SQL executed by Microsoft SQL Server
The two types of unmapped fields are computed and virtual. Unmapped fields always support read actions, but the feature specification might not require any development effort to support write actions.

Computed field

  • Value is generated by an SQL view computed column.
  • During read, data is computed by SQL and is fetched directly from the view.
  • For writes, custom X++ code must parse the input value and then write the parsed values to the regular fields of the data entity. The values are stored in the regular fields of the data sources of the entity.
  • Computed fields are used mostly for reads.
  • If possible, it's a good idea to use computed columns instead of virtual fields, because they are computed at the SQL Server level, whereas, virtual fields are computed row by row in X++.

Virtual field

  • Is a non-persisted field.
  • Is controlled by custom X++ code.
  • Read and write happens through custom X++ code.
  • Virtual fields are typically used for intake values that are calculated by using X++ code and can't be replaced by computed columns.

Properties of unmapped fields

CategoryNameTypeDefault valueBehavior
DataIsComputedFieldNoYesYes
  • Yes – The field is synchronized as a SQL view computed column. Requires an X++ method to compute the SQL definition string for the column. The virtual column definition is static and is used when the entity is synchronized. After that, the X++ method is not called at run time.
  • No – The field is a true virtual field, where inbound and outbound values are fully controlled through custom code.
DataComputedFieldMethodStringA static DataEntity method in X++ to build the SQL expression that will generate the field definition. This property is disabled and irrelevant if the property IsComputedField is set to No. The method is required if the property IsComputedField is set to Yes.


Example: Create a computed field

In this example, you add a computed field to the FMCustomerEntity entity. For reads, the field combines the name and address of the customer into a nice format. For writes, your X++ code parses the combined value into its separate name and address values, and then the code updates the regular name and address fields.
  1. In Microsoft Visual Studio, right-click your project, and add the existing FMCustomerEntity.
  2. In Solution Explorer, right-click the FMCustomerEntity node, and then click Open.
  3. In the designer for FMCustomerEntity, right-click the FMCustomerEntity node, and then click New > String Unmapped Field.
    Creating a new string unmapped field
  4. Rename the new field NameAndAddress.
  5. Update properties of the NameAndAddress unmapped field, as shown in the following screenshot.
    Updating the properties of the NameAndAddress unmapped field
  6. Go to FMCustomerEntity > Methods. Right-click the Methods node, and then click New. Ensure that the method name matches the DataEntityView Method property value of the unmapped computed field.
  7. Paste the following X++ code into the method. The method returns the combined and formatted NameAndAddress value.
     Note
    The server keyword is required.
    private static server str formatNameAndAddress()   // X++
    {
        DataEntityName      dataEntityName= tablestr(FMCustomerEntity);
        List                fieldList = new List(types::String);
        ////Format name and address to look like following
        ////John Smith, 123 Main St, Redmond, WA 98052
        fieldList.addEnd(SysComputedColumn::returnField(DataEntityName, identifierstr(FMCustomer), fieldstr(FMCustomer, FirstName)));
        fieldList.addEnd(SysComputedColumn::returnLiteral(" "));
        fieldList.addEnd(SysComputedColumn::returnField(DataEntityName, identifierstr(FMCustomer), fieldstr(FMCustomer, LastName)));
        fieldList.addEnd(SysComputedColumn::returnLiteral("; "));
        fieldList.addEnd(SysComputedColumn::returnField(DataEntityName, identifierstr(BillingAddress), fieldstr(FMAddressTable, AddressLine1)));
        fieldList.addEnd(SysComputedColumn::returnLiteral(", "));
        fieldList.addEnd(SysComputedColumn::returnField(DataEntityName, identifierstr(BillingAddress), fieldstr(FMAddressTable, City)));
        fieldList.addEnd(SysComputedColumn::returnLiteral(", "));
        fieldList.addEnd(SysComputedColumn::returnField(DataEntityName, identifierstr(BillingAddress), fieldstr(FMAddressTable, State)));
        fieldList.addEnd(SysComputedColumn::returnLiteral(", "));
        fieldList.addEnd(SysComputedColumn::cast(
            SysComputedColumn::returnField(DataEntityName, identifierstr(BillingAddress), fieldstr(FMAddressTable, ZipCode)), "NVARCHAR"));
        return SysComputedColumn::addList(fieldList);
    }
    
    T-SQL for the computed column.
    
    ( Cast (( ( T1.firstname ) + ( N' ' ) + ( T1.lastname ) + ( N'; ' ) +
        ( T5.addressline1 )
        + ( N', ' ) + ( T5.city ) + ( N', ' ) + ( T5.state ) + (
        N', '
        ) +
        ( Cast(T5.zipcode AS NVARCHAR) ) ) AS NVARCHAR(100))
    )
    AS
    NAMEANDADDRESS
    
     Tip
    If you receive error in data entity synchronization because of computed columns, it's easier to come up with the SQL definition in Microsoft SQL Server Management Studio (SSMS) before using it in X++.
  8. Rebuild the project.
  9. Synchronize the database. Don't forget this step. You can do this by going to Dynamics 365 > Synchronize database > Synchronize.

Example: Create a virtual field

In this example, you add a virtual field to the FMCustomerEntity entity. This field displays the full name as a combination of the last name and first name. X++ code generates the combined value.
  1. In the designer for the FMCustomerEntity entity, right-click the Fields node, and then click New > String Unmapped Field.
  2. In the properties pane for the unmapped field, set the Name property to FullName.
  3. Set the Is Computed Field property to No. Notice that you leave the DataEntityView Methodempty.
    Setting the properties for the unmapped field
  4. In the FMCustomerEntity designer, right-click the Methods node, and then click Override > postLoad. Your X++ code in this method will generate the values for the virtual field.
  5. Paste the following X++ code in for the postLoad override. Notice that the postLoad method returns void.
    public void postLoad()
    {
        super();
        //Populate virtual field once entity has been loaded from database
        //Format full name - "Doe, John"
        this.FullName = this.LastName + ", " + this.FirstName;
    }
    
  6. Compile your project.

Wednesday, November 7, 2018

Edit and Display Method in AX

Using the edit Method Modifier

The edit method modifier is used to indicate that a method’s return value is to be displayed on a form, and users can edit that value. If you don't want users to edit the value, use a display method.
Use the edit method modifier on the following:
  • Table methods
  • Form methods
  • Form data source methods
Write your edit methods on a table. You can use the same code in several forms.
edit methods are called each time the form is redrawn. They should not contain complex and time-consuming calculations.

Create an edit Method

Create an edit method on a form or table.
  1. Place the edit keyword immediately in front of the method’s return type.
  2. Create a Boolean parameter called Set. It is used to determine whether the user has entered anything into the control.
  3. Create a second parameter to hold the values that the user has entered into the control.
  4. If the edit method is on a form data source, create a third parameter for the data source. Place this parameter after the Set parameter.
Following is an example of an edit method on a table.
edit FreeTxt txtDefault(boolean Set, FreeTxt Txt)
Following is an example of an edit method on a form data source.
edit Amount settle(boolean set, CustTrans _CustTrans, Amount U)
edit methods must have a return type. The return value is typically a calculated value (for example, a sum). 

Use an edit Method on a Form or a Report

To use an edit method on a form, the control and the return type of the method must have identical types. For example, if you have a RealEdit control on your form, the edit method you are using must return a value of type real.
Add the edit method to a form control.
  1. Set the DataSource property for the control to the data source that contains the method.
    If you do not set the DataSource property, the system assumes that the method has been defined on the form.
  2. Set the DataMethod property to the name of the method.
You might also want to set the ExtendedDataType or ArrayIndex properties:
  • If the ExtendedDataType property is set, formatting, Help text, and so on are inherited from the type specified here.
  • If the edit method returns an array, set ArrayIndex to 0 to indicate that all array elements are to be shown in the control. If, for example, you set it to 2, only array element number two is shown.

Using the display Method Modifier


The display method modifier indicates that the method has a return value that can appear on a form or a report. A display method is any method that includes the display keyword as a method modifier. You can use the display method modifier with the following kinds of methods:
  • Table methods
  • Form methods
  • Form data source methods
  • Report methods
  • Report design methods
You should add a display method as a table method whenever possible. This enables you to use that same code with more than one form or report.

When you create or use a display method, you should be aware of the following issues:
  • The display method is called every time that the form is redrawn. To optimize form performance, the display method should not contain complex and time-consuming calculations.
  • The use of a display method can cause unintended information to become visible. For more information, see Security on Display and Edit Methods.
  • A display method is not activated if the method appears on a hidden tabbed page.
  • You have to add the display keyword to a form data source method when the return value of that method appears on a grid control.
  • To improve the performance of a display method, you can cache the method. For more information, see Caching display Methods.

To create a display method

To create a display method, follow these steps.
  1. Place the display keyword immediately in front of the method’s return type. For example:
    display Amount amount()
  2. Specify the return type. The return type should be an extended data type. In the previous step, the method has a return type of Amount.
    Typically, a display method returns a calculated value like a sum or count. For an example of a calculated value, see How to: Add a Control to a Form.
  3. Determine whether to add parameters to the display method. The following list shows when to add a parameter.
    • A display method for a table, form, report, or report design does not have any parameters. For example:
      display Amount amount()
    • A display method for a form data source does require a parameter. You use the parameter to specify a table buffer. The type of the table buffer has to match the type of the table in the form data source.
      The following example shows a display method that returns the number of customer records that appear in the form. Notice how the parameter has a type of CustTable. This table is in the form data source.
      X++
          display NumberOfRecords testMethod(CustTable myTable)
          {
             NumberOfRecords recCount = this.totalNumberOfRows();
             Return recCount;
          }
      

To use a display method in a form

To use a display method with a form control, the control and the return type of the method must be identical types. For example, if you have a RealEdit control on the form, the display method that you are using must return a value of type real.
The following steps show how to use a display method with a form control.
  1. Set the DataSource property for the control to the data source that contains the method.
    If you do not set the DataSource property, the system assumes that the display method is defined as a form method.
  2. Set the DataMethod property to the name of the display method.
  3. For some types of controls, you might also want to set the following properties:
    Property
    Description
    ExtendedDataType
    If this property is set, formatting, Help text, and other property values are inherited from the specified type.
    ArrayIndex
    If the display method returns an array, set this property to 0. The value 0 indicates that all array elements are to be shown in the control. If, for example, you set it to 2, only array element number two is shown.

To use a display method in a report

You can use display methods to provide data for reports. For a SQL Server Reporting Services report, you use a query as the data source for the report. You can use the display methods from the tables in that query to provide the data that appears in the report. For more information, see How to: Use Display Methods in a Report.
You can also use display methods with reports that you create or update with the X++ reporting framework. For example, the following steps use a display method from a table to specify a value for a control in a report.
  1. Set the Table property for the control to the table that contains the display method that you want to use.
    If you do not set the Table property, the system assumes the specified display method is defined as a report or report design method.
  2. Set the DataMethod property to the name of the display method.

Monday, November 5, 2018

How to fetch product Name using X++

EcoResProductName                       productName;
EcoResColor                             EcoResColor;
EcoResProductMaster                     EcoResProductMaster;
EcoResProductMasterColor                EcoResProductMasterColor;
EcoResProductMasterDimensionValue       EcoResProductMasterDimensionValue;
EcoResProductMasterDimValueTranslation  EcoResProductMasterDimValueTranslation;


select firstonly ProductMasterDimensionValue, Name  from EcoResProductMasterDimValueTranslation
        join RecId from EcoResProductMasterDimensionValue
             where EcoResProductMasterDimValueTranslation.ProductMasterDimensionValue   == EcoResProductMasterDimensionValue.RecId
        join RecId from EcoResProductMasterColor
            where EcoResProductMasterDimensionValue.RecId == EcoResProductMasterColor.RecId
        join RecId from EcoResColor
            where EcoResColor.RecId == EcoResProductMasterColor.Color
        join RecId from EcoResProductMaster
            where EcoResProductMasterColor.ColorProductMaster == EcoResProductMaster.RecId
            && EcoResProductMaster.DisplayProductNumber == lineEntity.ItemNumber;

        lineEntity.MCSTranslatedColorName = EcoResProductMasterDimValueTranslation.Name;

How to fetch variant wise Item price from costing using X++

public static Price getSTDCostItemPrice(ItemId             _itemId,

                                            TransDate       _activationDate,

                                            InventDimId     _inventDimId)

    {

        InventDim       inventDimLoc;

        InventItemPrice inventItemPrice;


        inventDimLoc    = InventDim::find(_inventDimId);

        inventItemPrice = InventItemPrice::findCurrent( _itemId,

                                                        CostingVersionPriceType::Purch,

                                                        _inventDimId,

                                                        _activationDate,

                                                        inventDimLoc.InventSiteId,

                                                        InventItemCostingType::Standard);


        return inventItemPrice.Price;

    }

Thursday, October 4, 2018

How to write OData Action Method?

[SysODataActionAttribute('updateShipmentDate', false)]
    public static void updateShipmentDate(DataAreaId _company, WHSShipmentId _ShipmentId, WHSShipConfirmUTCDateTime _ShipmentDate)
    {
        #OCCRetryCount;
        WHSShipmentTable whsShipmentTable;

        try
        {
        changecompany(_company)
            {
                select firstonly forupdate whsShipmentTable
                where whsShipmentTable.ShipmentId == _ShipmentId;
     
                if (whsShipmentTable.RecId)
                {
                    ttsbegin;
                    whsShipmentTable.ShipConfirmUTCDateTime =_ShipmentDate;
                    if(WHSShipmentTable.validateWrite())
                    {
                        whsShipmentTable.update();
                    }
                    ttscommit;
                }
            }
        }
        catch (Exception::UpdateConflict)
        {
            if (appl.ttsLevel() == 0)
            {
                if (xSession::currentRetryCount() >= #RetryNum)
                {
                    throw Exception::UpdateConflictNotRecovered;
                }
                else
                {
                    retry;
                }
            }
            else
            {
                throw Exception::UpdateConflict;
            }
        }
     
    }

Trade Agreements – How to Set Up Prices

Trade agreements in Dynamics AX 2012 allow for setting up prices and discounts for Products, Vendors, and Customers. (Or groups of Products, Vendors, and Customers). Trade agreements can be set up in a lot of different ways, with varying results.

Trade agreements are managed by setting up price/discount agreement journals.

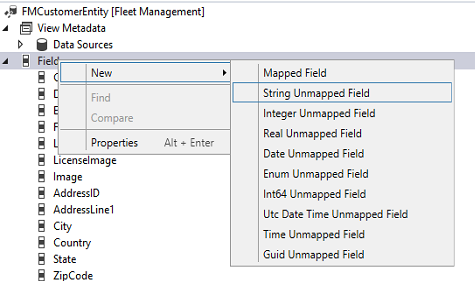
Navigate to Sales and marketing > Journals, or to Procurement and sourcing > Journals, and select Price/discount agreement journals and select “New”.

We will be creating a price adjustment journal:

Select Price, and tab through the line. We will have a new journal with a number assigned from the number sequence: Next, click on Lines to enter the prices for individual items

There are a number of options to complete when entering adjustment lines. The first is the relation column, which determines the function of the line:

The account code determines whether a price applies to all vendors, a group of vendors, or a single vendor. The choices are “All” for all, “Group” for a group, and, very intuitively, “Table” for a single vendor. J We are assigning a price for a group:


X++ code to get the price for the Item from the Trade agreement using PurchTable buffer :

public static PurchPrice getPriceDiscAmount(VendTable       _vendTable,
                                                ItemId          _aLineItemId,
                                                InventDimId     _aLineInventDimId,
                                                TransDate       _transDate,
                                                PurchQty        _purchQty,
                                                PurchUnit       _purchUnit,
                                                CurrencyCode    _currency)
    {
        PurchTable                      purchTable;
        PurchLine                       purchLine;
        purchTable.clear();
        purchTable.initFromVendTable(_vendTable);
        purchLine.clear();
        purchLine.initFromPurchTable(purchTable);
        purchLine.ItemId        = _aLineItemId;
        purchLine.InventDimId   = _aLineInventDimId;
        purchLine.DeliveryDate  = _transDate;
        purchLine.PurchQty      = _purchQty;
        purchLine.PurchUnit     = _purchUnit;
        purchLine.CurrencyCode  = _currency;
        purchLine.initFromInventTable(InventTable::find(_aLineItemId));
        return purchLine.PurchPrice;
    }

If you want to get the price using standard priceDisc class and priceGroup :

public static Price findPurchPrice(ItemId _itemId, VendAccount _vendAccount, InventDimId _inventDimId, Qty _qty)
   
{
        PriceDisc               priceDisc
;
        InventTable inventTable
= InventTable::find(_itemId);
        VendTable vendTable
= VendTable::find(_vendAccount);
       
//InventDim               inventDimItem       = inventTable.inventItemInventSetup().inventDim();
        InventDim inventDimItem
= InventDim::find(_inventDimId);
        UnitOfMeasureSymbol     unitId             
= inventTable.inventTableModuleInvent().UnitId;
        Price                   retPrice
;

        priceDisc
= new PriceDisc(ModuleInventPurchSales::Purch, _itemId, inventDimItem, unitId, systemDateGet(), _qty , _vendAccount);

       
if (priceDisc.findPrice(_vendTable.PriceGroup))
            retPrice
= priceDisc.price();
       
else if (priceDisc.findItemPrice())
            retPrice
= priceDisc.price();

       
return retPrice;
   

} In AX 2012 you can use the standard method to get the price from the trade agreement.
static void GetPriceFromItemAndVendor(Args _args)
{
    InventTable                 inventTable = inventTable::find('10000');
    InventDim inventDim;
    ItemId ItemId;
    UnitOfMeasureSymbol UnitId;
    TransDate TransDate;
    PriceDisc PriceDisc;
    container result;

    InventDim.initFromInventTable(inventTable);
    
    ItemId = "10000";
    UnitId = "Pcs";
    TransDate = today();

    result = PriceDisc::findItemPriceAgreement(ModuleInventPurchSales::Purch, ItemId, inventDim, UnitId, TransDate, 10000, "1001",
                            "USD", "0");

}


How to enable the dimension fields based on the Item selected on the form.

[Form] public class KMTShipFromWarehouses extends FormRun {     InventDimCtrl_Frm_EditDimensions        inventDimFormSetup;     /// &l...